SurgeryWeb Support Centre
Forms Administration
In this support page:
Editing a Form
To make changes to any of the forms, click the form name or select Edit.

This will open the full form editor, where you can amend the form, access Settings and its submenu, view, download or delete Entries.
You can also switch to a different form to edit by selecting it from the drop-down menu.
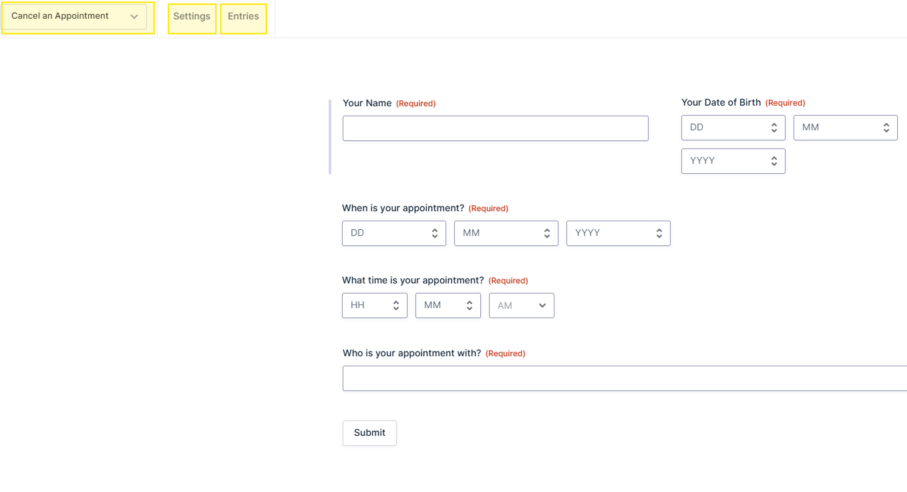
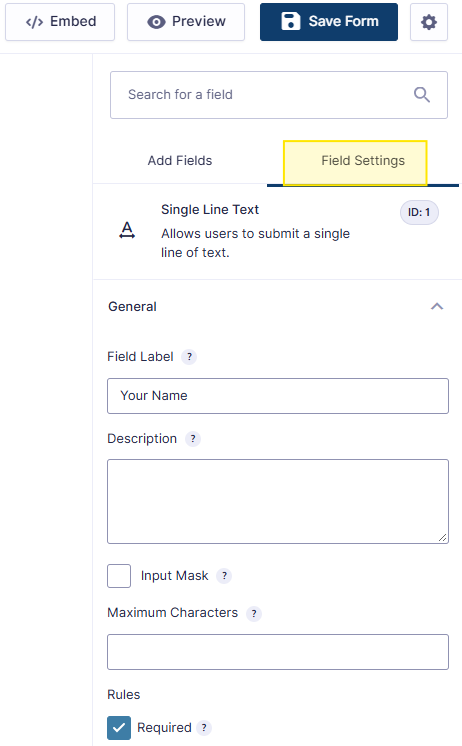
To amend a field in your form, click the section you would like to change, then select Field Settings.
Fields marked as Required are mandatory and will appear in red on the form. Patients must complete these fields before they can submit the form.
To add another field to your form, select Add Fields. You will see a range of different field types – scroll down to view all available options.
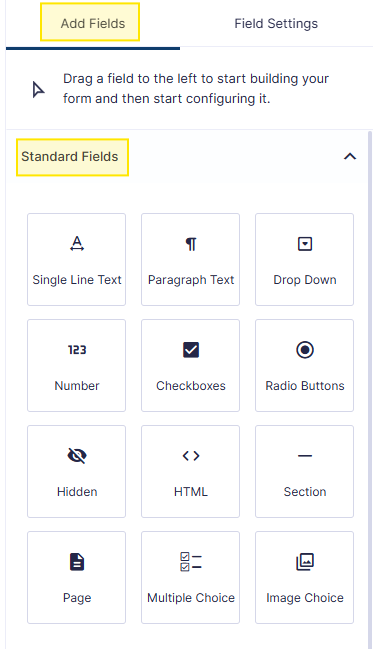
Select the field you need and it will be added to the bottom of the form.
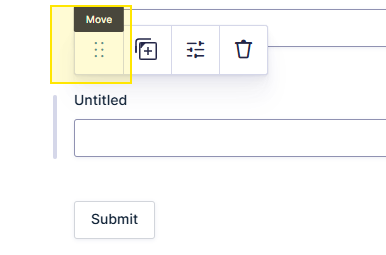
To move the field to a different position, use the Move option, then click and drag it to where you want it.
To rename the field, click the Settings icon next to the Bin. This will open Field Settings, where you can change the Field Label from Untitled to the name you need.
Preview
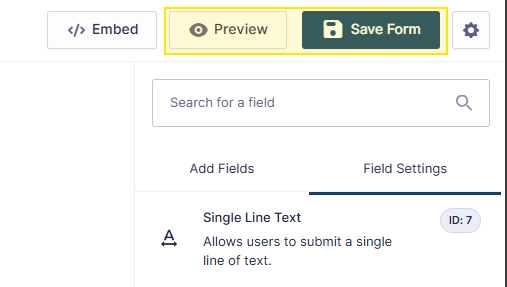
Once you are happy with your changes, you can Preview the form and then Save it using the options in the top-right corner.
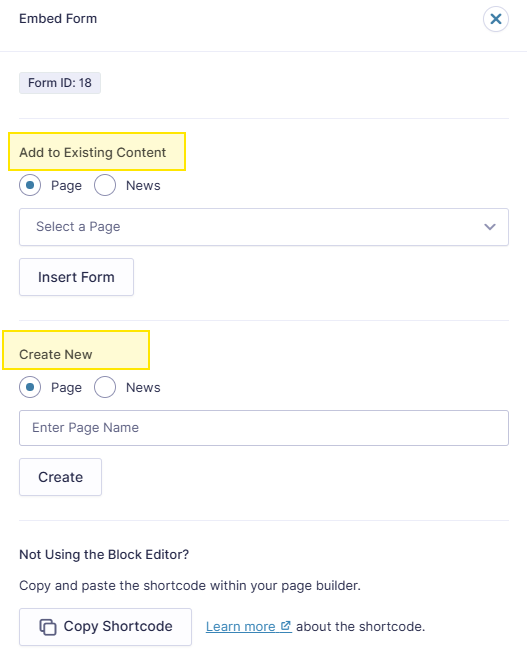
You can also Embed the form into an existing page or create a new page for it.
Settings
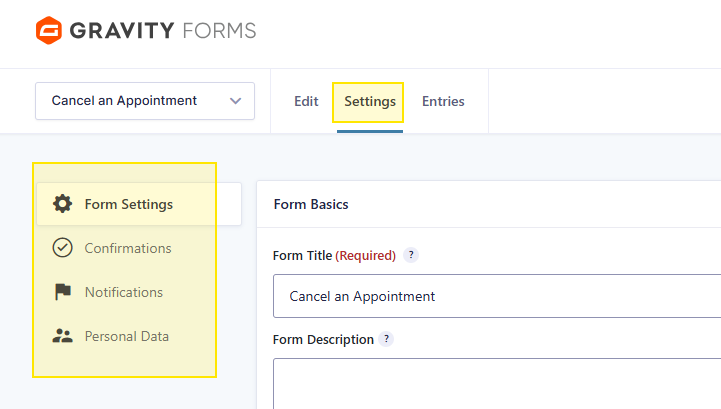
The Form Settings area controls the main options for your form. From here, you can change the form title and description, adjust how fields and messages are displayed, set restrictions, manage spam protection and choose other form options.
Most of the settings can be left as they are unless you need to change how the form works or appears.
Confirmations
From the Settings menu, select Confirmations. This section controls what patients see after they submit a form.
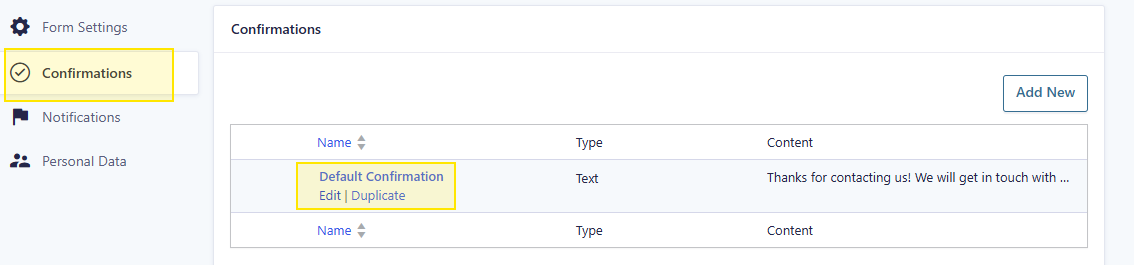
You can either Add New or Edit an existing confirmation.
To change the default confirmation message, hover over your Confirmation and select Edit.
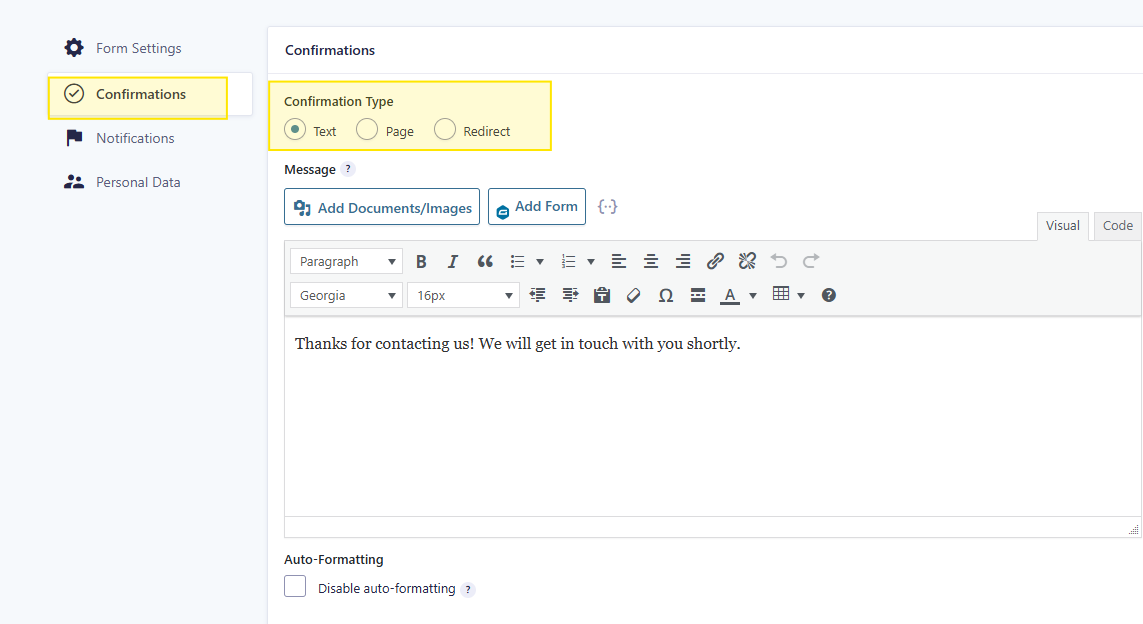
You can choose from three confirmation types:
- Text – displays a message on screen after the form has been submitted.
- Page – sends the patient to another page on the website.
- Redirect – sends the patient to a specific web address.
If using Text, you can edit the confirmation message in the box provided.
Once you have made your changes, click Save Confirmation.
Notifications
The Notifications section controls the emails that are sent when a form is submitted.
You can view any existing notifications, including whether they are Active, the notification name, email subject and the event that triggers them.
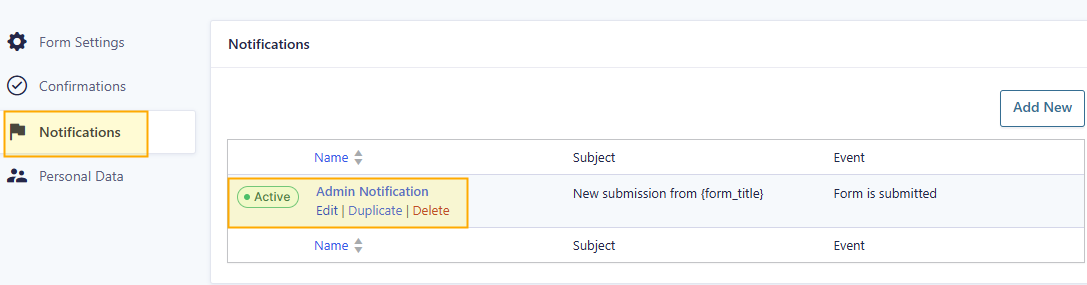
To make changes, click Edit or the notification name.
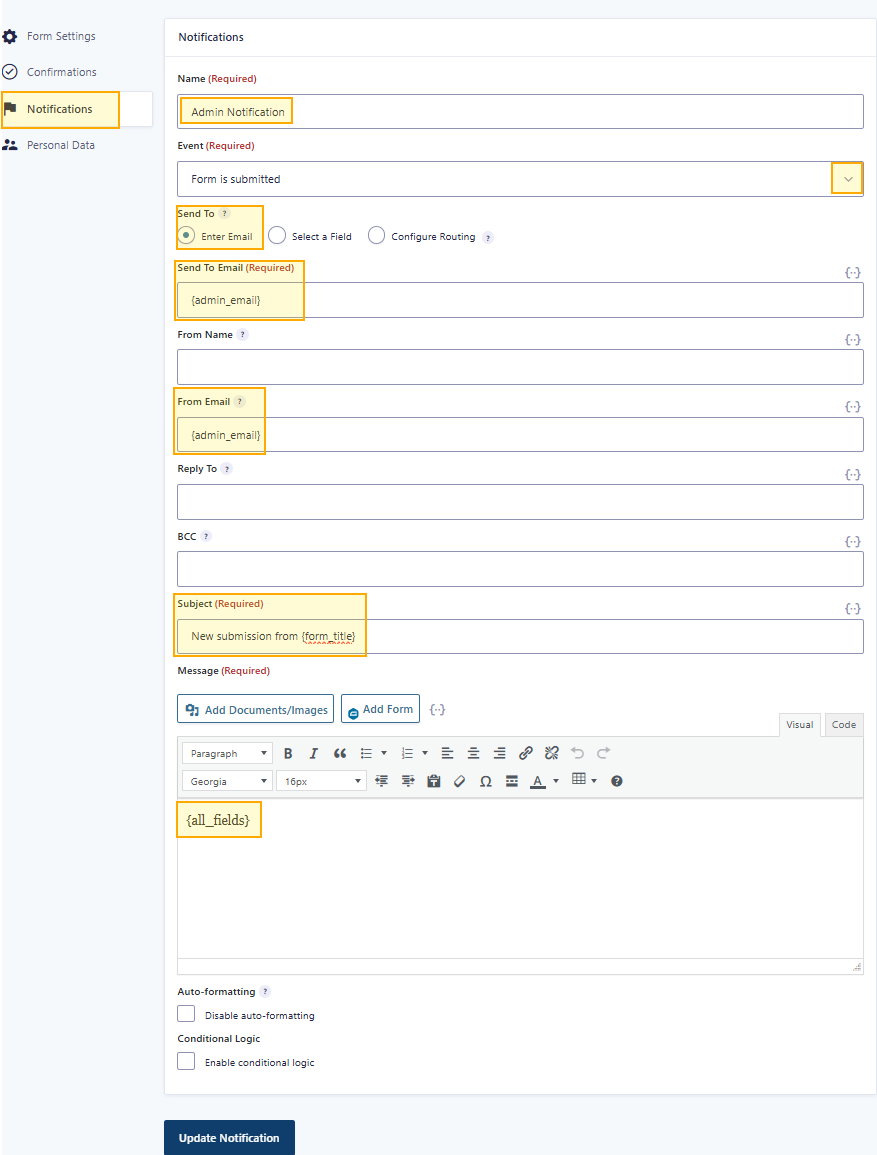
- Name – the name of the notification, for example Admin Notification.
- Event – controls when the notification is sent. In most cases, this will be when the Form is submitted.
- Send To – choose how the recipient email address is set. You can enter an email address directly, select one from a form field or configure routing.
- Send To Email – the email address that will receive the notification.
{admin_email}uses the website administrator email address. Check that this is appropriate, as it may be linked to an individual user. For practice form submissions, a shared monitored email address is usually more suitable. - From Email – the email address the notification is sent from.
{admin_email}uses the website administrator email address, which may belong to an individual. Consider using an appropriate practice or shared email address instead, ideally one configured for sending website emails. - Subject – the subject line of the notification email.
{form_title}automatically inserts the name of the form. - Message – controls what information is included in the email.
{all_fields}automatically includes all information submitted through the form.
Personal Data
The Personal Data section controls how information submitted through the form is stored and retained.
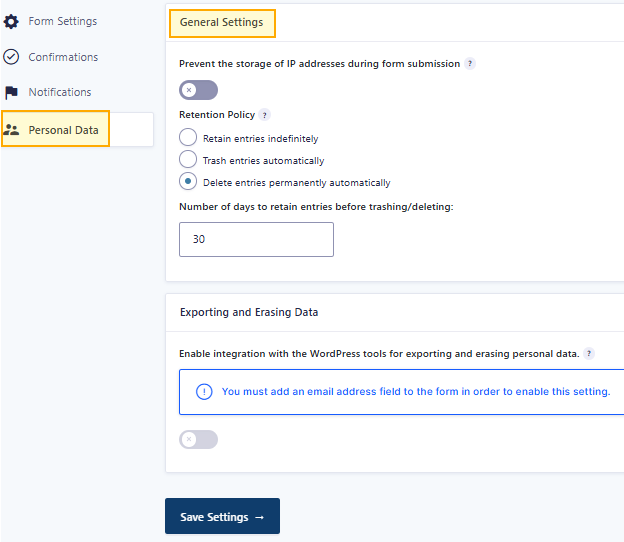
- Prevent the storage of IP addresses during form submission – when enabled, this stops the visitor’s IP address from being stored with the form entry.
- Retention Policy – controls how long submitted entries are kept. You can:
- Retain entries indefinitely
- Move entries to Trash automatically
- Delete entries permanently automatically – permanently deletes entries after the number of days you specify in Number of days to retain entries.
Once you have made any changes, click Save Settings.
Entries
The Entries section shows the submissions received through the form.
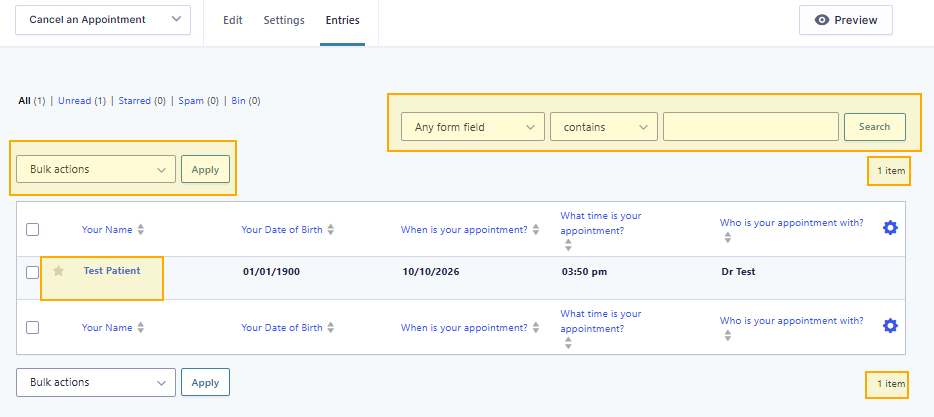
From here, you can:
- view individual form submissions
- see the information entered into each field
- search for a specific entry using the search options
- filter entries by All, Unread, Starred, Spam or Bin
- select one or more entries and use Bulk actions to manage them
- click an entry, such as the patient name, to open and view the full submission
The total number of entries currently displayed is shown on the right-hand side.
Entries will only remain available according to the form’s Retention Policy.
Duplicate
The Duplicate option creates a copy of an existing form.
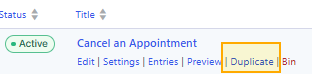
This is useful if you want to create a new form that is similar to one you already have, without starting from scratch.
The duplicated form will be created as Active automatically, so check the status if you are not ready for it to be used straight away.
You can then rename and edit the duplicate as needed, while the original form remains unchanged.
Bin
The Bin option moves a form out of the active forms list without permanently deleting it straight away.
The form does not need to be made inactive before moving it to the Bin.
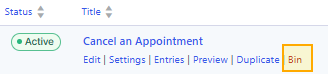
Forms in the Bin can be restored if needed, or permanently deleted when you are sure they are no longer required.
Before permanently deleting a form, make sure you no longer need the form or any associated entries.
Was this helpful? Give it a thumbs up!