SurgeryWeb Support Centre
Create a New Page
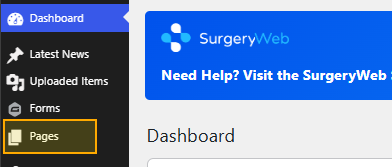
From the dashboard, click Pages in the left-hand menu.
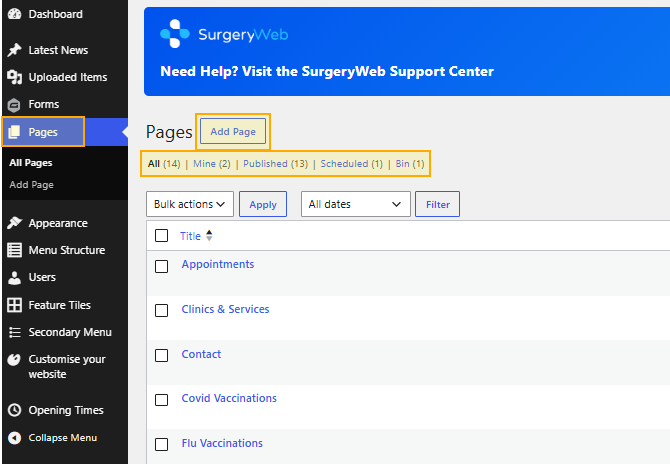
This opens the Pages library, where you can see all pages on the website.
At the top of the page, you can filter the list to show:
- All pages
- Your pages
- Published pages
- Scheduled pages
- Pages in the Bin
Pages that are still being worked on may also appear as drafts in the list.
Create a new page
At the top of the Pages library, click Add Page.
This opens the page editor.
Add the page title
Enter the page name in the title box at the top of the screen.
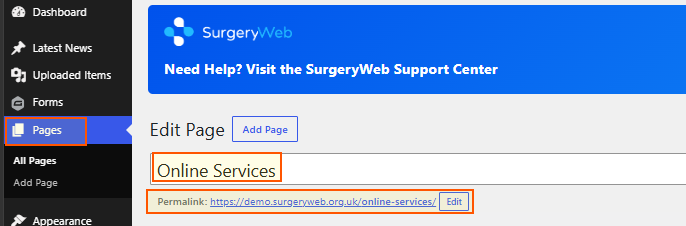
For example: Online Services
Once the title has been entered, WordPress will create a permalink underneath it. This is the web address for the page. Example in the screenshot above: https://demo.surgeryweb.org.uk/online-services.
You can click Edit next to the permalink if the page address needs changing.
The permalink must be unique to the website. WordPress will not allow two pages to use the same permalink.
If a page with the same permalink has previously been deleted, WordPress may still treat that address as being in use while the deleted page remains in the Bin and will automatically add a number at the end. If needed, check the Bin and permanently delete the old page before trying to reuse the same permalink.
Add the page content
Enter the main page content in the large editing area underneath the title.
The toolbar above the content area can be used to format the page. For example, you can:
- create headings and paragraphs
- make text bold or italic
- create bullet or numbered lists
- add or remove links
- change text alignment
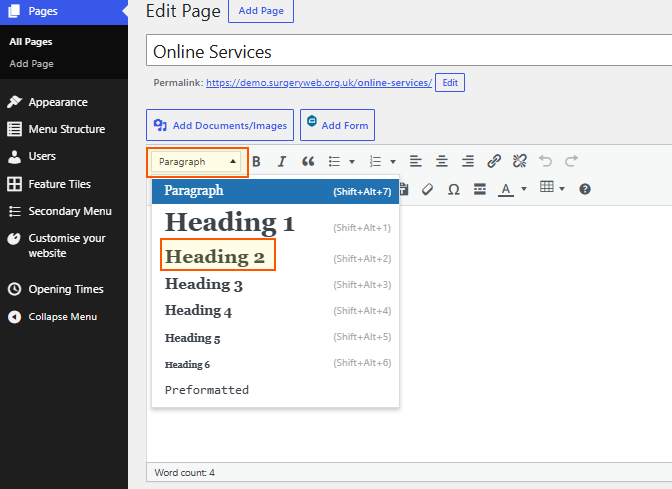
Use the dropdown currently showing Paragraph to choose a heading style when creating headings.
Visual and Code view
At the top-right of the content editor you will see Visual and Code.
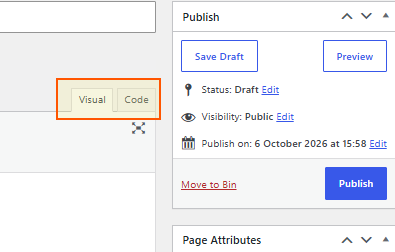
Visual is the normal editing view and should be used for most page editing.
Code shows the HTML behind the page and should normally only be used if you are comfortable editing HTML.
Add documents, images and forms
To add a document or image to the page, click Add Documents/Images above the formatting toolbar.
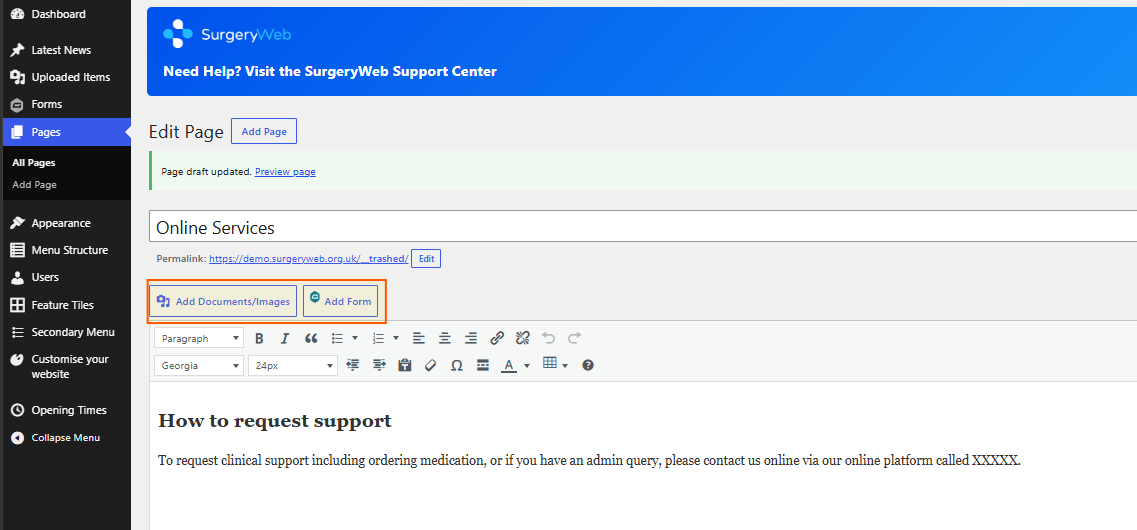
You can then upload a new file or select an existing file from the Media Library.
If you need to insert one of the website forms into the page, click Add Form.
You can then select the required form and add it to the page.
Page attributes
On the right-hand side of the page editor you will see the Page Attributes section, just under the Publish section.
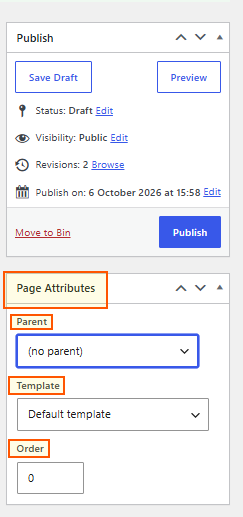
Parent
Use Parent if the new page needs to sit underneath another page in the website structure.
For example, a page about prescriptions could have Services as its parent page.
If the page does not need a parent, leave this as (no parent).
Template
Leave this as Default template unless you have been instructed to use a different page template.
Order
The Order field can be used where page order is relevant. In most cases, this can be left as 0 unless a different order is required.
Add Tiles to Your Page
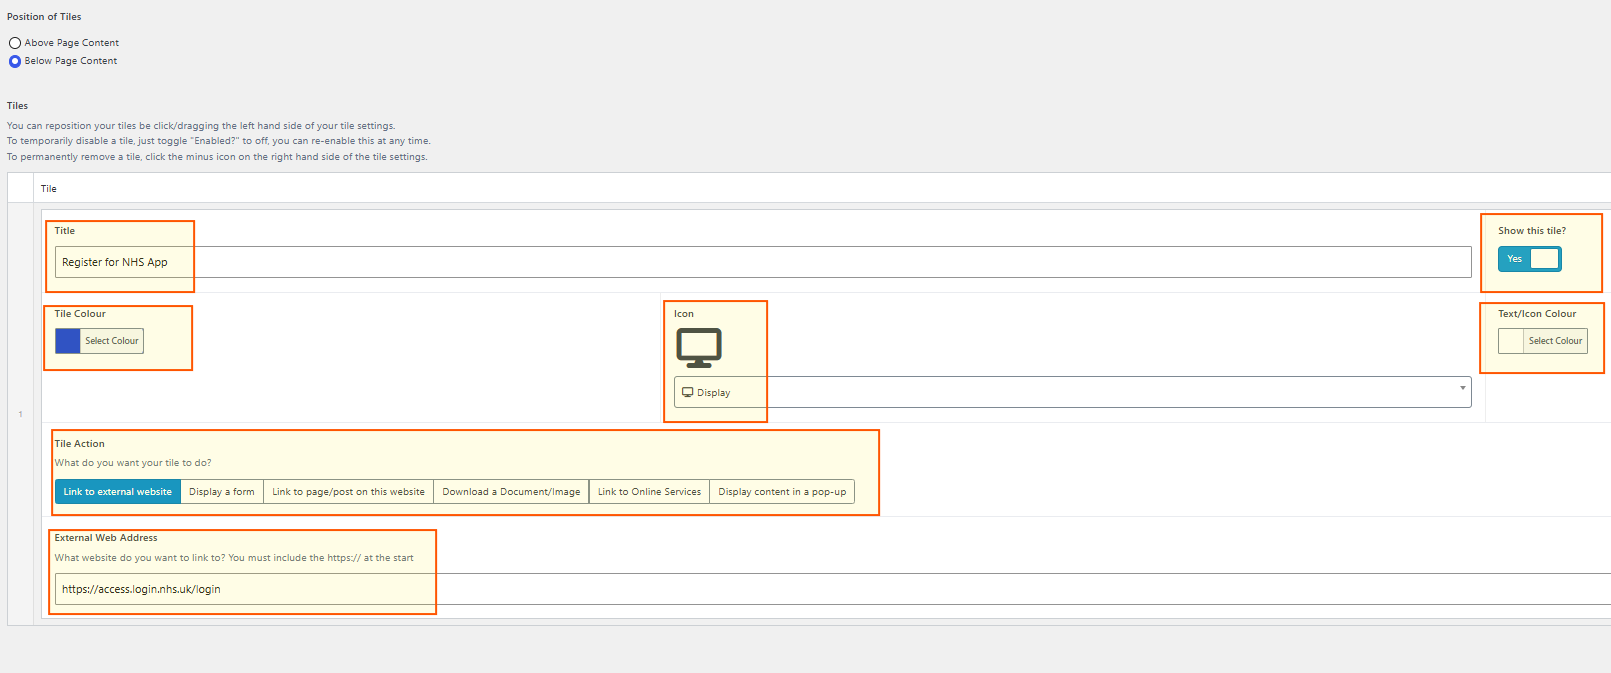
Tiles are clickable boxes that can be added to a page to direct visitors to other content or services.
You can choose whether the tiles appear above or below the main page content.
For each tile, you can set:
- the tile title
- the tile and text/icon colours
- an icon
- whether the tile is shown
- what happens when the tile is clicked
Tile actions include linking to another website, displaying a form, linking to another page or post, downloading a document or image, linking to Online Services, or displaying content in a pop-up.
If you have more than one tile, you can drag them into the order you want them to appear.
The example below shows a tile set up to link to the NHS App login page.
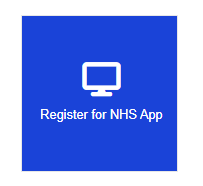
This will display on the page as shown below.
When a visitor clicks on the tile, they will be taken to the NHS App login page: https://access.login.nhs.uk/login
Save the page as a draft
If the page is not ready to go live, click Save Draft.
This saves your work without publishing the page.
You can return to the Pages library and continue editing it later.
Preview the page
Before publishing, click Preview in the Publish section on the right-hand side.
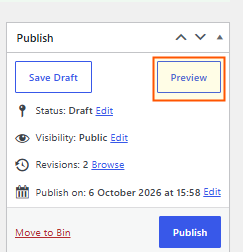
This allows you to see how the page will look on the website before making it live.
Publish the page
When the page is complete and ready to go live, click Publish.
Once published, the page will be available on the website using its permalink.
Was this helpful? Give it a thumbs up!