SurgeryWeb Support Centre
Forms Overview
From the Main Menu, click Forms.
This will open the Forms submenu, where you can select:
- New Form – create a new form to add to the website.
- Entries – view and manage responses that have been submitted through your forms.
- Import / Export – forms can be imported using a JSON file created by Gravity Forms. You can also share exported forms with other GP practices and export entries from your forms. Please note: you can only import forms in .json format created by Gravity Forms. Other file formats cannot be imported.
It will also open the Forms homepage, where you can view and manage all of your created forms, including both active and inactive forms. You can also see the number of Entries retained for each form, depending on your retention policy, as well as the number of Views.
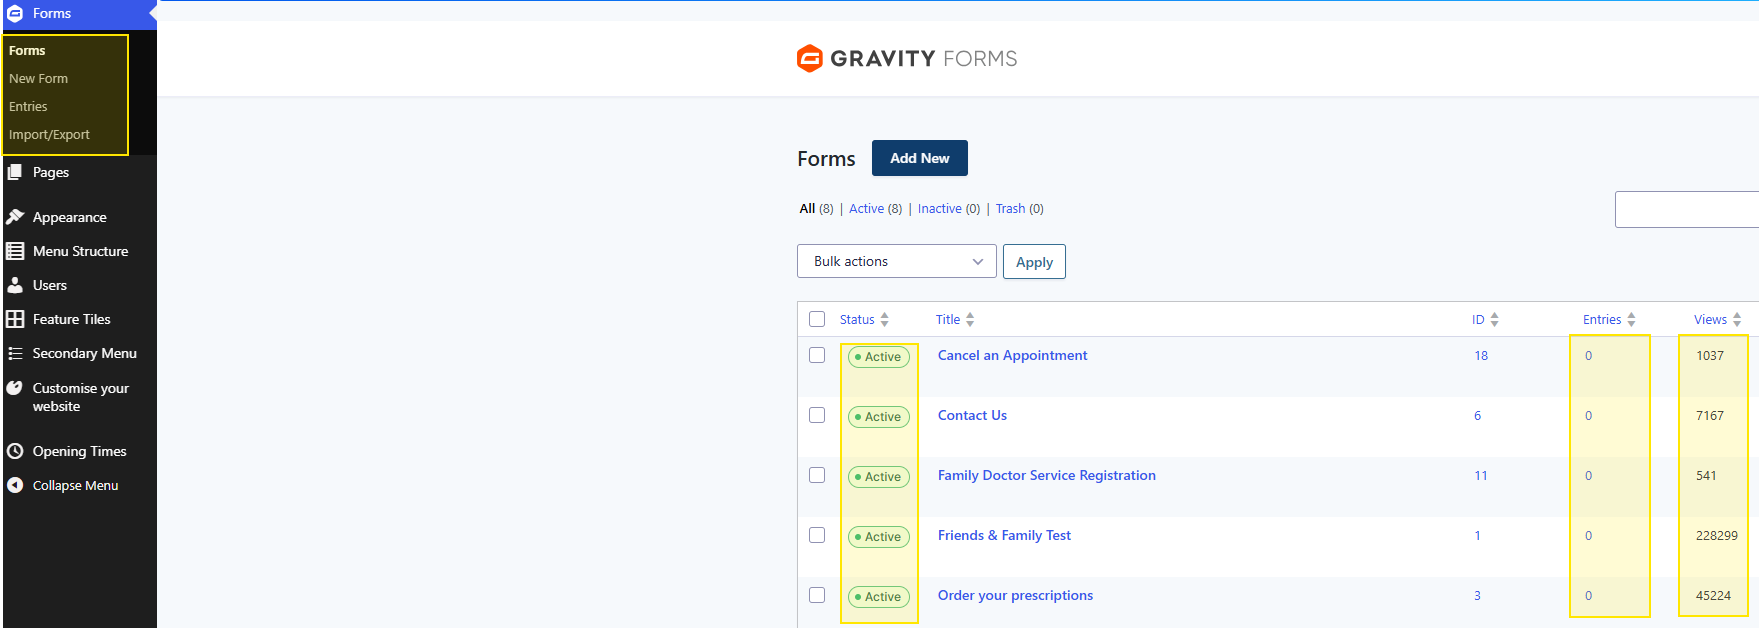
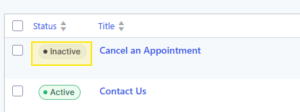
To make a form inactive, click the green Active status next to the form. The status will then change to Inactive.
When you hover over a form, a menu of available options will appear beneath the form title.

- Edit – open the form to make changes to its fields and content.
- Settings – manage the form’s settings and configuration.
- Entries – view and manage responses that have been submitted through the form.
- Preview – see how the form will look before making further changes.
- Duplicate – create a copy of the existing form.
- Trash – move the form to the Trash.
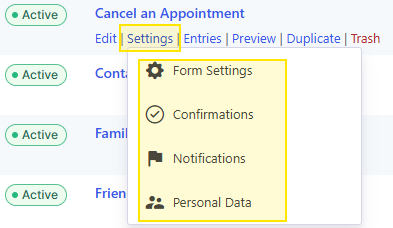
Under Settings, you can select:
- Form Settings – manage the main settings for the form, including its title and other form options.
- Confirmations – control what the patient sees after they submit the form, such as a confirmation message or redirect.
- Notifications – manage the email notifications sent when a form is submitted.
- Personal Data – manage how personal information submitted through the form is handled.
Was this helpful? Give it a thumbs up!