SurgeryWeb Support Centre
How to Auto-Expire a Post
If you would like to schedule a post to auto-expire to remove it from public view on a specific date and time, you can schedule it to auto-expire.
Navigate to the post you want to set to auto-expire from the Dashboard by clicking on “Latest News” from the left sidebar.
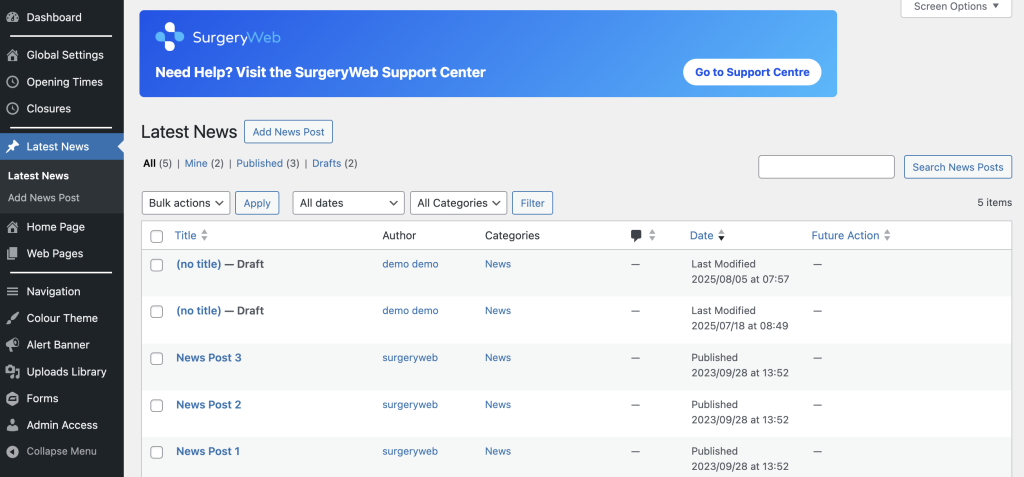
All your website’s posts should be displayed.
Click on the title of the post you would like to auto-expire.
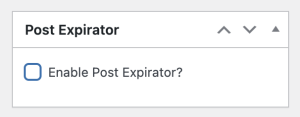
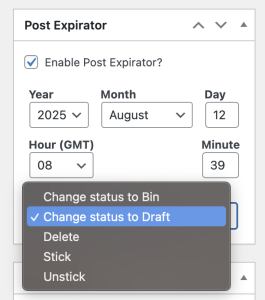
Navigate to the “Post Expirator” in the right hand sidebar and tick the “Enable Post Expirator?” box.
Enter the date and time that you would like the post to expire and click on the “Change status to Draft” dropdown list.
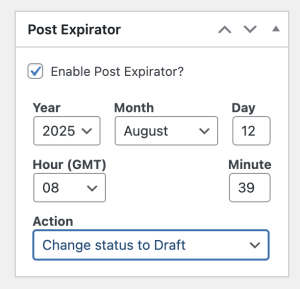
Select the required action from the dropdown list.
You can select “Change status to Draft” so that it remains in Draft status.
Alternatively, if you want to remove it completely, you can select “Delete” or “Change status to Bin” if you want to move it into the Bin where it will stay in Trash for 30 days before being permanently deleted.
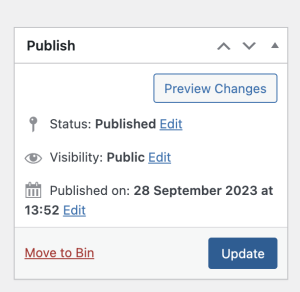
Navigate to the “Publish” sidebar and click the “Update” button to confirm the changes.
Was this helpful? Give it a thumbs up!